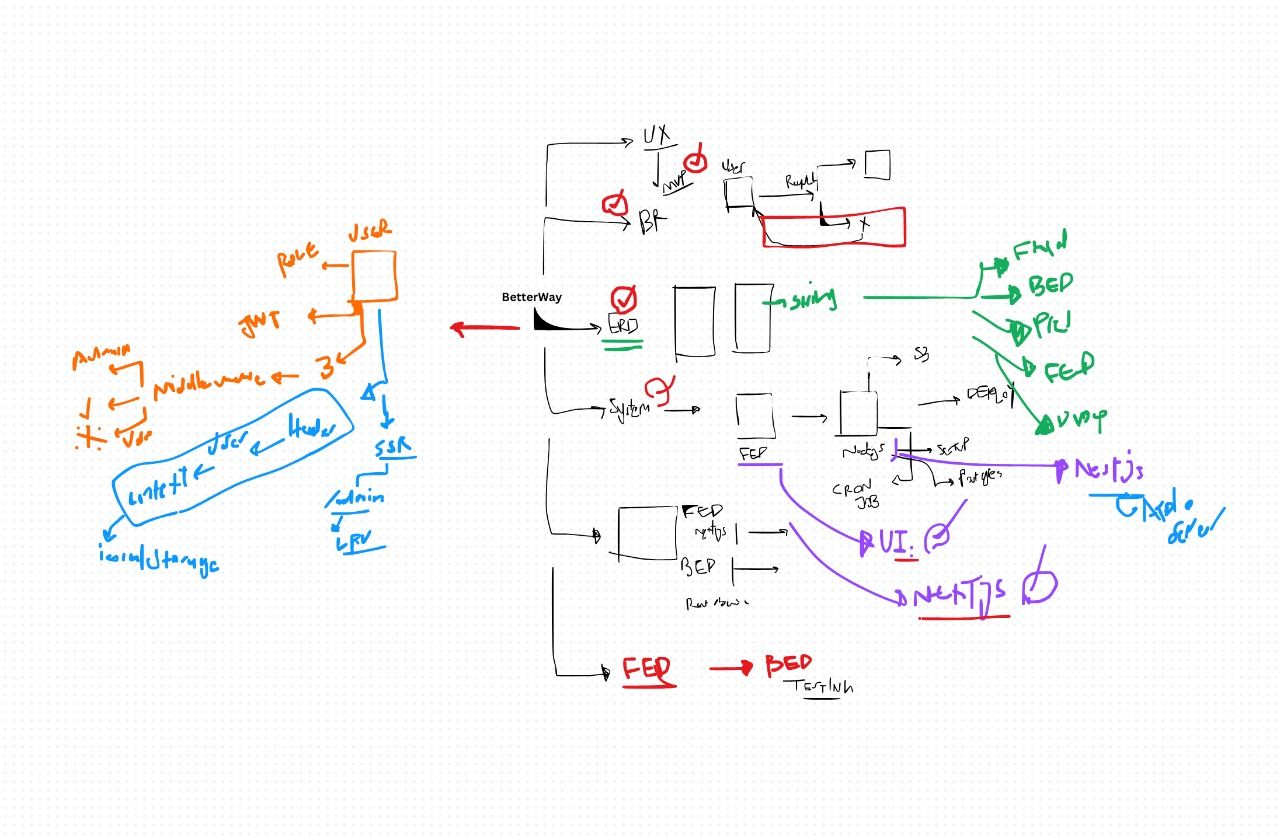
A Step-by-Step Guide: Starting a Web Project with a Client
Starting a web project with a client involves a systematic approach that ensures clarity, collaboration, and successful outcomes. From understanding business requirements to deploying the final product, each step requires careful planning, communication, and execution. Let’s dive into the essential phases of initiating a web project with a client.
Step 1: Understanding and Documenting the Business Requirements
Before diving into development, it's crucial to understand the client's business objectives, target audience, and desired outcomes. Conduct thorough discussions, interviews, and workshops to gather requirements. Document these requirements meticulously to serve as a reference point throughout the project lifecycle. Clear communication and alignment at this stage lay the foundation for a successful collaboration.
Step 2: Analyzing and Approving the MVP Features
Once the requirements are gathered, prioritize them to define the Minimum Viable Product (MVP). The MVP should include essential features that address the core needs of the users and deliver value to the client. Collaborate with the client to review and approve the MVP features, ensuring that expectations are aligned and resources are optimized.
Step 3: Create and Organize ERD for the System
Next, create an Entity-Relationship Diagram (ERD) to visualize the data structure and relationships within the system. The ERD serves as a blueprint for database design and helps in understanding the data flow. Present the ERD to the client for review and approval, ensuring that it accurately represents their business logic and requirements.
Step 4: Draw a Detailed Version of System Design
After finalizing the ERD, proceed to design the system architecture in detail. Consider all aspects including user interface, modules, workflows, and integrations. Draft a comprehensive system design document covering technical specifications, third-party integrations, and scalability considerations. Present the system design to the client for feedback and approval, ensuring that all requirements are addressed and expectations are met.
Step 5: Choose Your Tools
Selecting the right tools and technologies is crucial for the success of the project. Evaluate various options for frontend frameworks, backend languages, databases, and other development tools based on project requirements, scalability, and client preferences. Collaborate with the client to finalize the technology stack, ensuring alignment with project goals and future scalability.
Step 6: Start with Frontend Development
With the groundwork laid, commence frontend development by creating wireframes, prototypes, and UI designs. Focus on delivering an intuitive user experience that aligns with the client's brand and vision. Regularly collaborate with the client to gather feedback and make necessary iterations to ensure that the frontend meets their expectations.
Step 7: Connect Frontend to Backend APIs
Once the frontend is ready, integrate it with the backend APIs to enable functionality and data exchange. Develop robust APIs that adhere to RESTful principles and handle requests efficiently. Test the integration thoroughly to ensure seamless communication between the frontend and backend components.
Step 8: Ensure Comprehensive Testing
Testing is integral to delivering a high-quality product. Implement both frontend and backend testing strategies to validate functionality, performance, and security aspects. Write unit tests, integration tests, and end-to-end tests to cover all business logic and user scenarios. Collaborate with the client to conduct User Acceptance Testing (UAT) and address any issues or feedback promptly.
Step 9: Deploy with CI/CD
Deploying the web application using Continuous Integration and Continuous Deployment (CI/CD) pipelines streamlines the release process and ensures consistency and reliability. Automate the build, test, and deployment processes to minimize manual intervention and reduce the risk of errors. Monitor the application post-deployment and iterate based on user feedback and performance metrics.
Step 10: Implement Monitoring and Maintenance
Once the web application is deployed, it's essential to implement monitoring tools to track its performance, availability, and user interactions. Set up monitoring dashboards and alerts to detect and address issues promptly. Monitor key metrics such as response times, error rates, and server health to ensure optimal performance.
Additionally, establish a maintenance plan to address bugs, security vulnerabilities, and scalability concerns post-deployment. Regularly update software dependencies, apply security patches, and optimize performance to enhance the user experience and mitigate risks. Collaborate with the client to prioritize maintenance tasks and allocate resources accordingly.
By implementing effective monitoring and maintenance practices, you can ensure the long-term success and sustainability of the web application, providing ongoing value to the client and end-users alike.
In conclusion, starting a web project with a client involves a structured approach encompassing understanding requirements, designing the system, choosing the right tools, and delivering a quality product through collaboration and iteration. By following these steps diligently and maintaining open communication with the client, you can ensure the success of the project and deliver a web application that meets their expectations and drives business value.
